Custom Workspaces
Prelim supports Custom Workspaces for financial institutions that require specialized workflows outside of our pre-built categories (e.g.,In Branch Account Opening, Online Account Opening etc.). These workspaces are tailored to reflect your institution’s unique use cases while maintaining a consistent Prelim navigation experience.
Dashboard The Dashboard is your homebase where you will access all applications. From the dashboard, you can view and manage applications in one place, and easily start an application (if enabled).
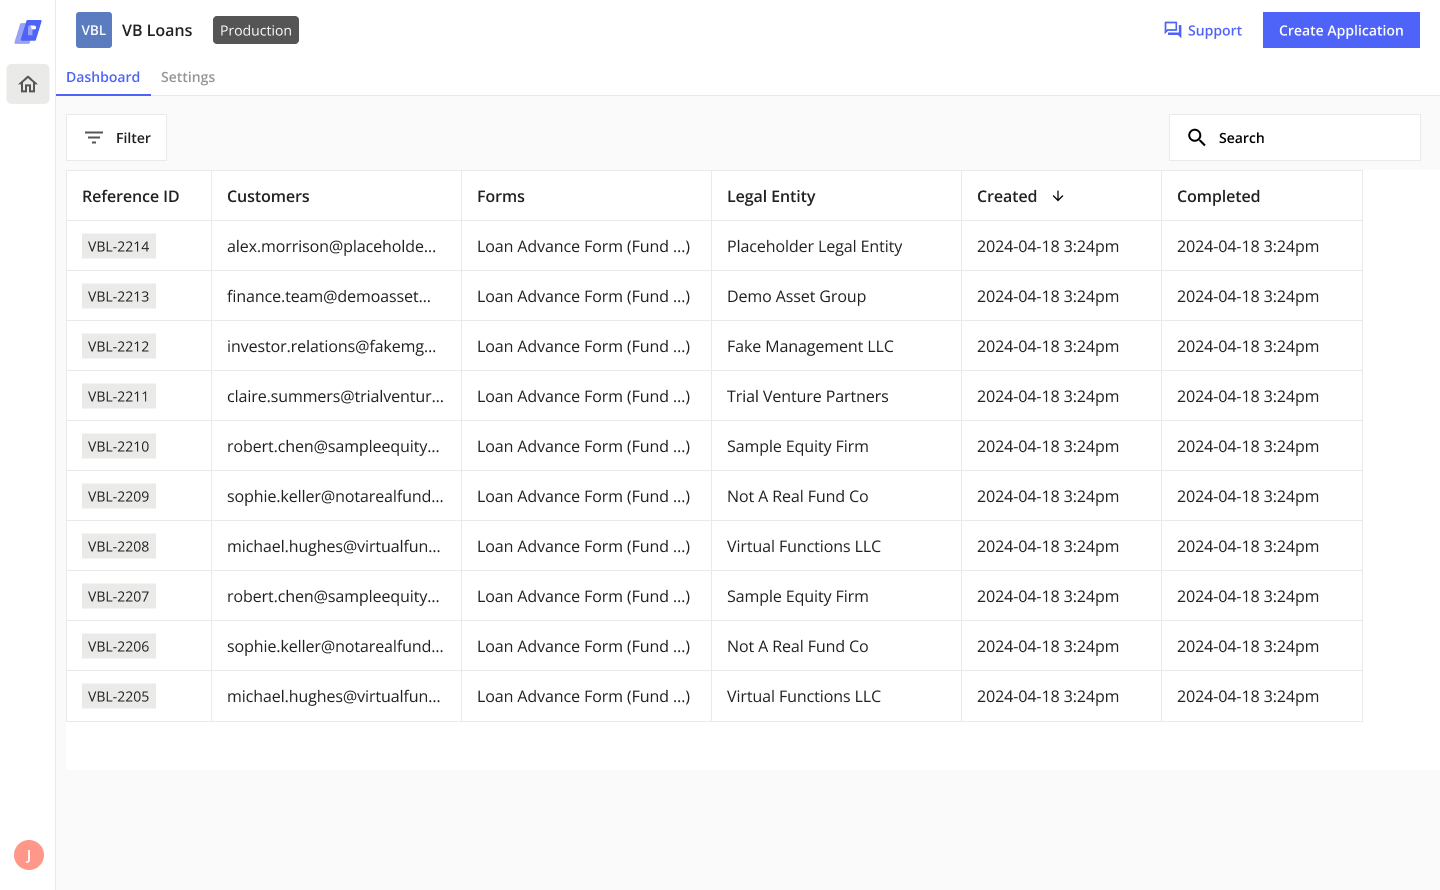
Table All applications are displayed on the dashboard within a table. The columns of the table provide a high-level overview of the application.
Helpful Hint To view any long text that is cut off on the table, hover on that cell of the table to bring up an expanded view of the text in that cell.
Table Columns:
All columns after the first (Reference ID) are customizable. Columns can be mapped to any input ID, Created By, Assignee, Completed Date, Docusign Completed. For any assistance with column display, please contact Prelim Support.
Initiating an Application
You can start new applications from within the dashboard, if enabled. Select the Create Application button in the top right corner of the dashboard to begin your application.
Navigating an Application When completing an application, you can view the main sections of the form at any time on the left side bar. Your current section is highlighted in purple.
If you would like to navigate within the sections of an application, you can select a previous section to jump back to the first page in that section. Since later sections of applications often rely on information gathered earlier in the application, you cannot jump forward in an application. To move forward in an application, you must complete and click through each page individually.
Exiting an Application As you complete an application it will automatically save after each change you make in the workflow. To save and exit an application, select the Save & Exit button in the top right corner of the form header. This will pause the application at the current point, and take you back to the app dashboard.
Application Overview
Accessing the Overview Panel The application overview panel allows you to see all the details about an application. The overview panel can be accessed from the dashboard and within an application.
To view the overview panel for a specific application on the dashboard, select anywhere on that application’s row on the table.
Within an application, you can open the overview panel to get a big picture view of the entire application. To open the pane within an application, select the Overview button on the right side of the application header.
This will open up the overview panel on top of the application.
Resume Application You can use the overview panel to resume any uncompleted application. To resume an application, select the application you would like to resume from the dashboard. This will open the overview panel. The status of the application can be viewed in the banner at the top of the overview panel. For applications that are in-progress, the status will say “Application In Progress”. Select the Resume button to re-open and walk through the application.
Tabs
The overview panel has many tabs to provide insight into different parts of the application.
Overview Tab The overview tab provides a high-level overview of the state of the application as the workflow is completed. The Products Selected section displays all of the products that are being applied for within the application. The Individuals Added section displays a preview of all of the customers that have been added to the application.
The Activities feed displays a log of all user activity within the application.
Forms Tab
The forms tab displays all workflows in this application and their current status. The eye icon indicates that the form is for internal use and not visible to customers. The people icon indicates that the form is accessible to customers.
Clicking on a specific form will open a real-time, read-only view of all of the information that has been entered into that form at this point in the application.
Adding Forms You can add any supplementary forms to an application manually by clicking Add Form. This will bring up the list of forms that have been enabled to be added to an application in your custom app.
Removing Forms Click on the three dots to remove a supplementary form from an application. If the form is an essential part of the application flow it will not be removable.
Restarting a Form To Restart a form click on the three dots next to the form to take you back to the first page. Any information previously should be retained unless it’s dependent on form logic to retain the values.
Verifications Tab
The Verifications Tab shows the results of all KYC, KYB, CDD integrations run within the application. Selecting an individual or business in the verifications tab will allow you to see more details about their results.
E-Sign Tab
The E-Sign tab shows the status of all document signature envelopes that have been electronically delivered or presented in-person to the customers. From this tab, you can view the overall status of each envelope, the signers attached to each envelope, and the status of each signer.
Helpful Hint Select the ⋮ button on an envelope, to take action on that envelope. From that menu you can refresh the status of the envelope, resend it to the signers, or void it.
Select the ⋮ button on a signer, to correct that signers information. This will open up a modal where you can edit the email and name of that authorized signer.
Files Tab
The Files tab lists all documents that were generated for or collected from the customer as part of the application. You can use this tab to preview and download individual documents. You can also select multiple files to preview them in sequence or download them all at once.
Core Tab
The core tab provides an overview of all customers and accounts boarded or updated in the bank’s core.
Selecting a customer or account in the core tab will allow you to see more details about the information that was boarded to the core.
Funding Tab
The funding tab tracks the funding of all accounts opened in this application. You can see the funding source for each account as well as the status of funding sources that have yet to be settled. File Exports Tab The file exports tab provides an overview of files sent to any document management systems, including file names, indexes, and status of the export.
Delete Application
You can delete an application, within that application’s overview panel. Deleting an application sets its status to “Deleted” and hides it from the default dashboard view. To delete an application, select Delete Application in the more actions section on the Overview tab.
What to know about migrations
- Folders will be retired and replaced by Statuses within each workspace app
- Each team will be migrated into a custom workspace app that contains all of their existing forms and flows
- New workspace apps will retain historical submission data and applications
Support
If you ever run into issues and need to contact the Prelim Support team for help, you can submit a support ticket directly from the online app dashboard. To open the support window, you can either select the Support button in the top right corner of the header or you can select the Support button in the bottom left corner of the side panel.
Updated 5 months ago